How to Cancel Your Hostinger Account and Get Refund
Here is a step-by-step guide for canceling your Hostinger account and requesting a refund:
Step 1: Decide which Hostinger services you want to cancel – web hosting, domain registration, or both. You can cancel just the hosting and keep your domain with Hostinger.

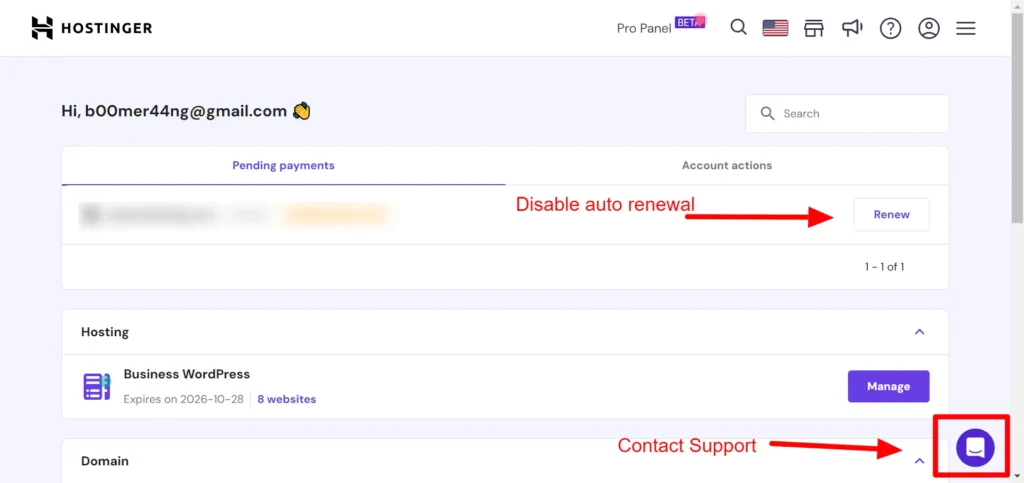
Step 2: To cancel your hosting plan only (and keep your account open), contact Hostinger customer support for assistance. Alternatively, you can disable auto-renewal on your hosting plan so it does not renew at expiration.
Step 3: To initiate a full refund, click this link to access the automated refund process. Find the relevant invoice from the last 30 days and click “Refund”.

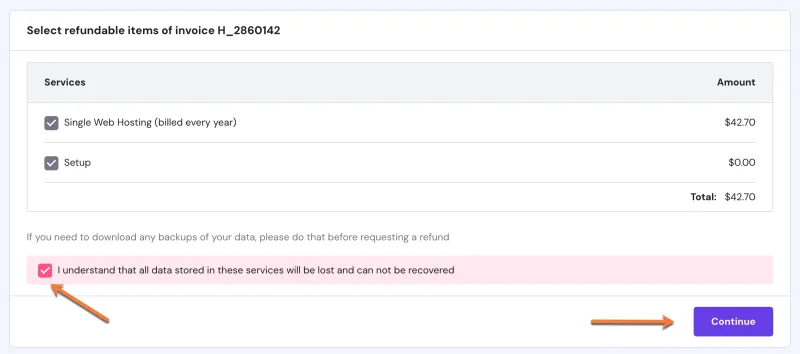
Step 4: Review the selected refundable services. Note that your site’s data will be removed after submitting the request. Check the acknowledgement box and click “Continue”.
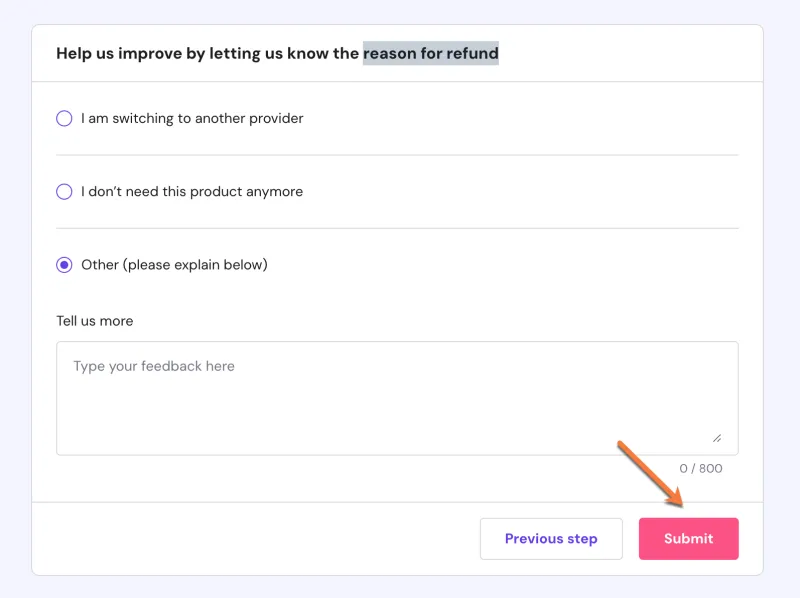
Step 5: Provide the reason for your refund request, then click “Submit”.
Step 6: Review all the information before finishing the refund process. Click “Request refund” to submit your request.

Step 7: Once you receive the refund confirmation email, allow 7-14 business days for the refund to be processed by your bank/card issuer.

Conclusion
I hope you loved this amazing guide on how to cancel hostinger plan and get refund.
Let me know if you have any doubts.